Framing a Deck on a Slope: Elevated Deck Code Requirements Explained
If your backyard drops away from the house, climbs a hillside, or sits a full story below your kitchen door, you have probably wondered whether a deck is even possible. It is, but framing a deck over sloped or elevated ground is a different project than framing one over a flat lawn. The footings go deeper, the posts get taller, the connections carry more load, and the building code has more to say about all of it.
This guide walks through the requirements step by step, the way a deck builder in Ontario, California would explain them over the phone. It covers the codes, footing depths, post spacing, and framing decisions that decide whether an elevated deck stands solid for decades or ends up on an inspector's problem list. By the end, you will know what questions to ask and what a legitimate quote should include.
One note before we start. Plenty of companies look at a steep lot in Rancho Cucamonga or a walkout grade in Corona and simply pass on the job. Sloped-lot decks take more planning, not magic. Here is how the work actually breaks down.
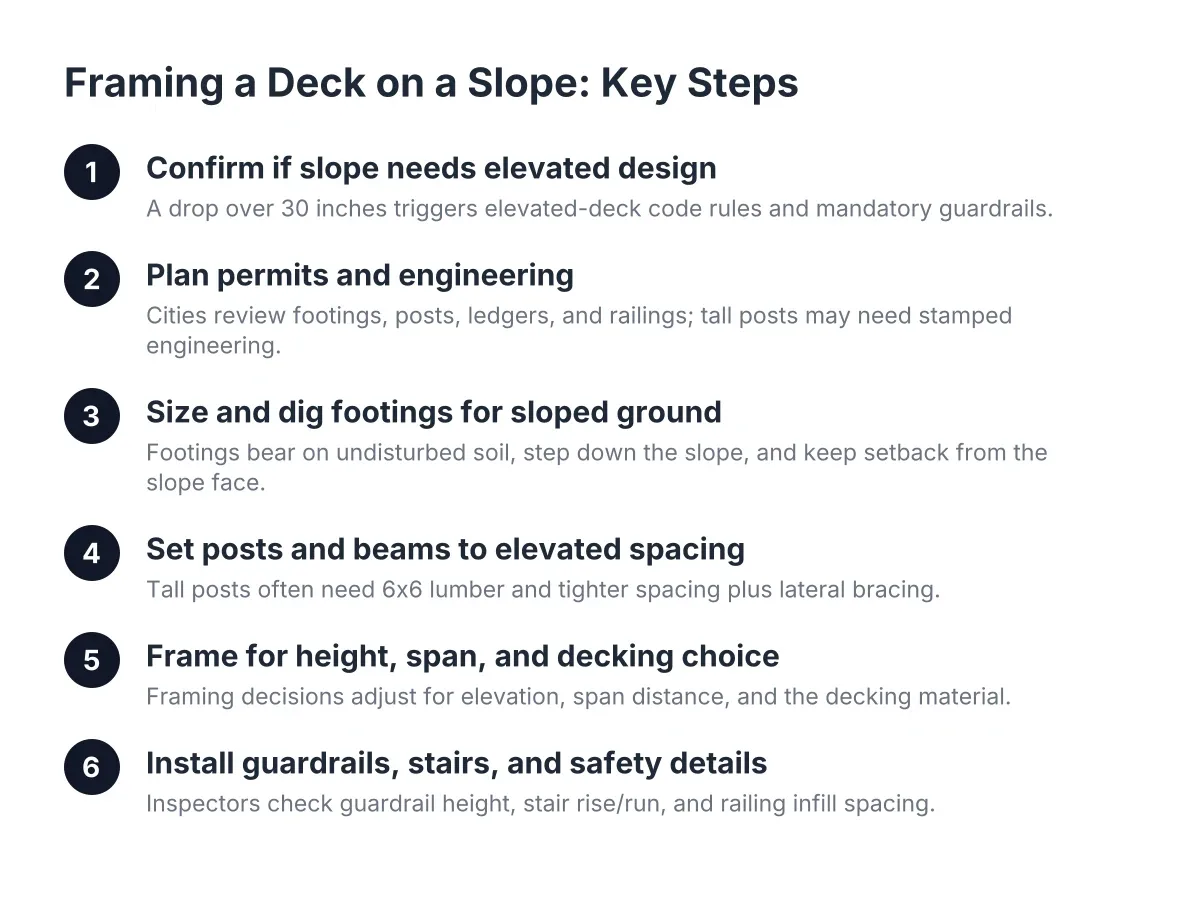
Step 1: Confirm Whether Your Slope Needs an Elevated Deck at All
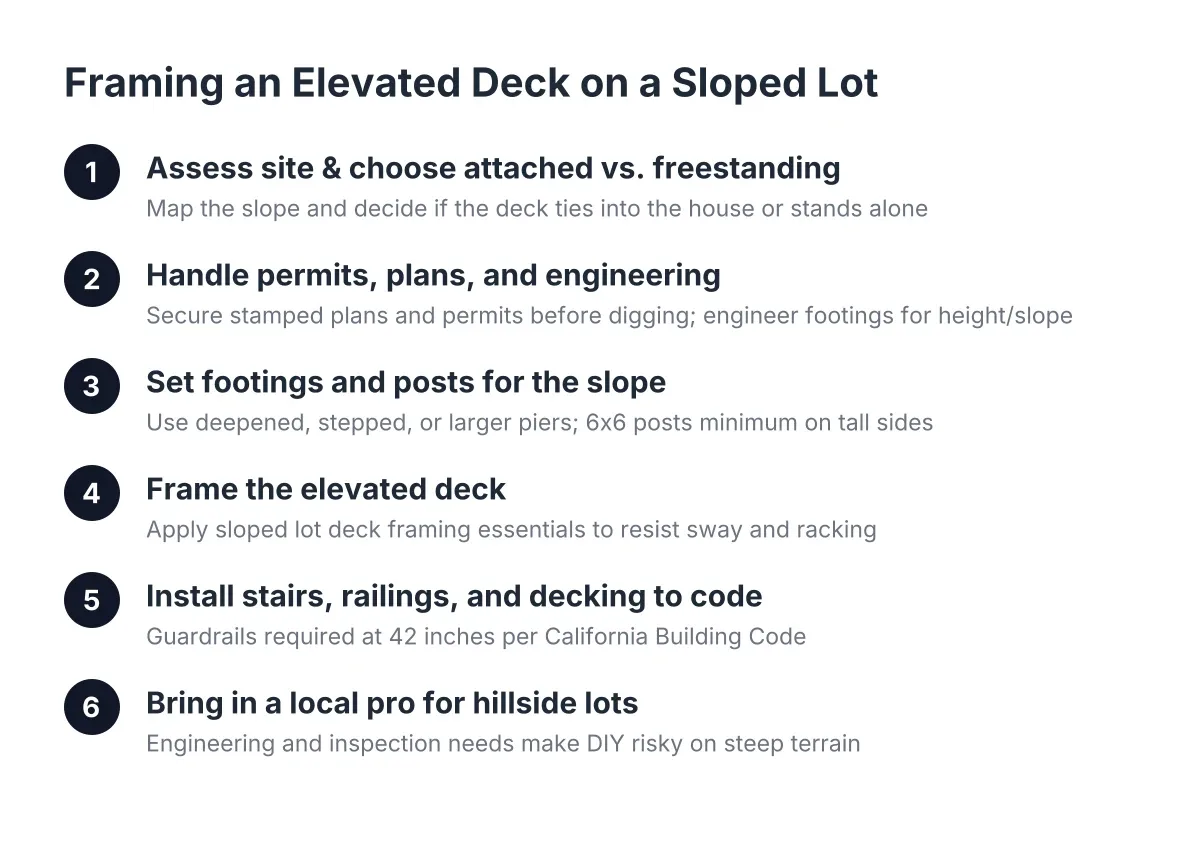
First, figure out how much height you are actually dealing with. Stand at the door where the deck will attach, then measure down to the ground at the far edge of the planned deck area. A drop under 30 inches keeps you in simpler territory. A drop over 30 inches changes the rules.
That 30-inch number matters because it is the trigger point in the California Building Code. Once a deck surface sits more than 30 inches above the ground below, guardrails become mandatory, and the California Building Standards Commission sets the minimum guardrail height at 42 inches for most residential decks. Stairs, landings, and railing infill spacing all come with their own requirements at that point.
On a sloped Inland Empire lot, the drop often varies across the deck. The side near the house might be 18 inches off grade while the downhill corner floats 6 feet in the air. In that case, the whole structure gets designed to elevated-deck standards. You do not get to treat half the deck as a ground-level build.
Step 2: Plan Around the Permit and Engineering Requirements
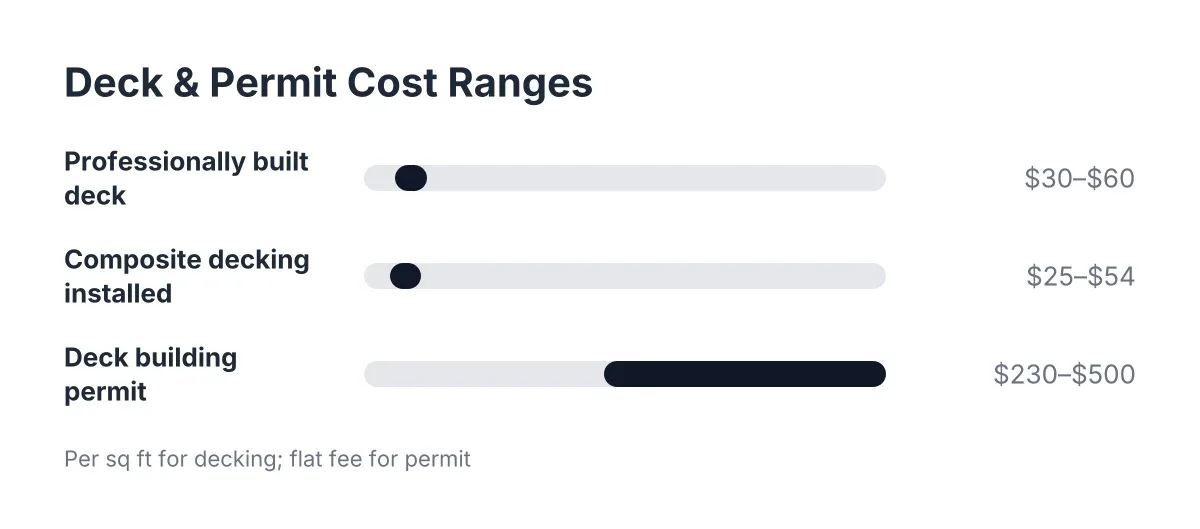
Next, accept that an elevated deck in San Bernardino County or Riverside County will need a permit, and plan for it early rather than late. Cities like Ontario, Upland, and Fontana review deck plans for footing size, post connections, ledger attachment, and railing height before anyone digs a hole. According to HomeAdvisor, a deck building permit typically costs between $230 and $500 depending on location, which is small money compared to redoing unpermitted work.
Here is where elevated builds differ from flat-lot builds. When posts run tall, when the deck attaches to a second story, or when footings land on a cut or fill slope, the city may require stamped structural engineering. That is normal for hillside work in Southern California, not a red flag. A deck builder who handles elevated deck construction regularly will fold the engineering and permit paperwork into the project instead of leaving it on your plate.
For a home-seller on a timeline, this step is the honest reality check. An elevated structural build is a weeks-to-months project, not a pre-listing touch-up. If an inspector flagged your existing elevated deck before a sale, repair, railing replacement, or resurfacing is usually the faster path, and a local deck repair visit can tell you which category you are in.
Step 3: Size and Dig Footings for Sloped Ground
Footings are where sloped-lot decks are won or lost. On flat ground, a footing just needs to reach undisturbed soil below the surface. On a slope, the footing also has to resist the ground's tendency to move downhill, which means deeper excavation, wider diameters, or both.
A few rules of thumb that inspectors across the Inland Empire look for:
- Bear on undisturbed native soil. Footings poured on loose fill or landscaping backfill settle, and a tall post multiplies every fraction of an inch of settlement at the deck surface.
- Step footings down the slope. Each footing gets dug to proper depth at its own spot on the hill. You never notch a slope flat and pour shallow pads across it.
- Keep setback from the slope face. On steeper grades, code requires footings to sit a set horizontal distance back from the downhill slope face, or be deepened until they achieve that bearing. This is the detail that most often sends a hillside deck to an engineer.
- Upsize for taller posts. A 6-foot post delivers more concentrated load and more leverage than a 2-foot post, so footing diameter and depth grow with deck height.
Deck footing and post installation on a slope is slow, physical work, and it is the least visible money in the whole budget. However, it is also the part you can never upgrade later without tearing the deck apart. Spend here first.
Step 4: Set Posts and Beams to Elevated-Deck Spacing
With footings in, the vertical structure goes up, and post sizing is where elevated decks diverge sharply from ground-level ones. Short decks often get away with 4×4 posts. Once posts run tall, 6×6 becomes the practical standard because slender tall posts can buckle and flex under load.
Post spacing follows the beam. The farther apart the posts, the bigger the beam has to be to span between them, so builders balance the two. On elevated builds, tightening post spacing often makes more sense than upsizing beams, because it also stiffens the whole structure against sway. Tall decks additionally need lateral bracing, usually diagonal knee braces or sheathed sections, so the deck does not rack side to side. On a flat-lot deck you can sometimes skip bracing; on a tall deck you cannot.
Every connection in this load path needs rated metal hardware: post bases that anchor to the footings, post caps that tie posts to beams, and joist hangers at the frame. Toenailed connections that pass on a low deck will fail inspection, and eventually fail in service, on an elevated one.
Step 5: Frame the Deck for Height, Span, and Decking Choice
Now the actual framing begins, and height changes the math here too. Framing a deck at elevation means joist spans, ledger attachment, and blocking all get checked harder than they would on a 2-foot-high platform.
The ledger deserves special attention. An attached deck on a hill hangs part of its weight on the house, so the ledger must bolt through to the home's rim framing with proper flashing above it. Failed ledgers cause most serious deck collapses, which is why inspectors scrutinize this connection. On some hillside homes, a freestanding frame with its own post row near the house beats a ledger entirely.
Your decking choice feeds back into the frame as well. Framing a deck for composite decking usually means 16-inch joist spacing or tighter, since composite boards flex more between joists than wood. Planning a picture frame border means adding extra blocking at the perimeter so border boards have solid fastening. If you are dreaming about a hot tub on a second story deck, say so before framing starts; the point loads require a reinforced frame designed for them, not one adapted afterward.
Step 6: Install Guardrails, Stairs, and the Safety Details Inspectors Check
Finally, the safety layer. As covered in Step 1, any deck surface more than 30 inches above grade needs a guardrail at least 42 inches high under the California Building Code. Infill, whether balusters, cable, or panels, must not allow a 4-inch sphere to pass through. Stairs on a sloped yard often become multi-flight runs with landings, and each landing needs its own footing and railing treatment.
Deck railing installation on an elevated deck is structural, not decorative. Rail posts must resist a hard outward push, which means through-bolted connections with proper blocking, not lag screws into a single rim board. This is a common failure point on older decks; the North American Deck and Railing Association estimates that about half of the roughly 50 million decks in the U.S. are more than 25 years old, and loose railings are one of the first things that age out.
What Framing a Deck on a Slope Costs Compared to Flat Ground
Elevated and sloped-lot decks cost more than flat-lot decks of the same square footage, and the difference lives almost entirely below the deck boards. Deeper footings, taller 6×6 posts, bracing, engineering, and stair runs all add labor and material that a flat build never needs.
For broad context, Angi puts the average cost of a professionally built deck at $30 to $60 per square foot, with composite decking running $25 to $54 per square foot installed. Treat elevated work as landing toward the upper end of any range, sometimes beyond it, because deck construction cost scales with height and terrain difficulty, not just deck size. A detailed quote should itemize footings, framing, decking, and railing separately so you can see where the slope money goes.
Suppose a homeowner in Chino has a walkout lot where the yard sits 7 feet below the main-floor slider. A hypothetical build there might involve engineered footings stepped down the grade, a braced 6×6 post structure, a bolted ledger with flashing, and an L-shaped stair with a mid-landing. That same square footage on a flat pad would skip the engineering, the bracing, and most of the stair, which is exactly why online deck cost calculators mislead people with sloped yards.
When to Bring In a Professional
If your deck will stand more than a few feet off the ground, sit on a slope, or attach at a second story, this is not a weekend framing project. Soil conditions, slope setbacks, and lateral bracing design are judgment calls that an experienced deck builder or structural engineer should make, because mistakes here are structural, not cosmetic. A local deck building company that works Inland Empire hillsides every week has seen your lot's problem before and knows which footing and framing solution the city will approve.
The good news for first-time deck planners: a sloped yard is not a disqualifier. It is a design input. Decks built correctly on tricky terrain often end up as the best outdoor living spaces in the neighborhood, precisely because the height earns you the view.
If you need custom deck design, Inland Empire Decks can help.
Prefer to talk it through? Call (909) 298-8578 — a quick call is usually the fastest way to get a straight answer for your situation.