How to Build an Elevated Deck: Step-by-Step Framing and Structural Guide
If your backyard drops off behind the house, or your main living space sits a full story above grade, a standard ground-level deck will not work. The good news is that a sloped or elevated lot is a solvable problem, not a dealbreaker. This guide walks through how to build an elevated deck step by step, including sloped lot deck framing strategies, from footings on a hillside to the framing and railing requirements that keep a raised structure safe. It is written for Ontario, CA homeowners planning their first deck, so you can walk into a conversation with a deck builder already understanding what the project involves.
One honest note up front: an elevated deck is not a weekend DIY project. The steps below explain the process so you can evaluate quotes and ask sharp questions, not so you can skip the professional. Anything more than a few feet off the ground carries real structural risk, and in San Bernardino County it will need a permit and inspections.
Why Elevated Decks Follow Different Rules Than Ground-Level Decks
A deck 18 inches off the ground mostly has to hold weight straight down. A deck eight or ten feet in the air has to resist swaying, racking, and pulling away from the house, all while standing on posts that act like levers. That changes everything: footing size, post dimensions, beam spans, and the hardware that ties it together.
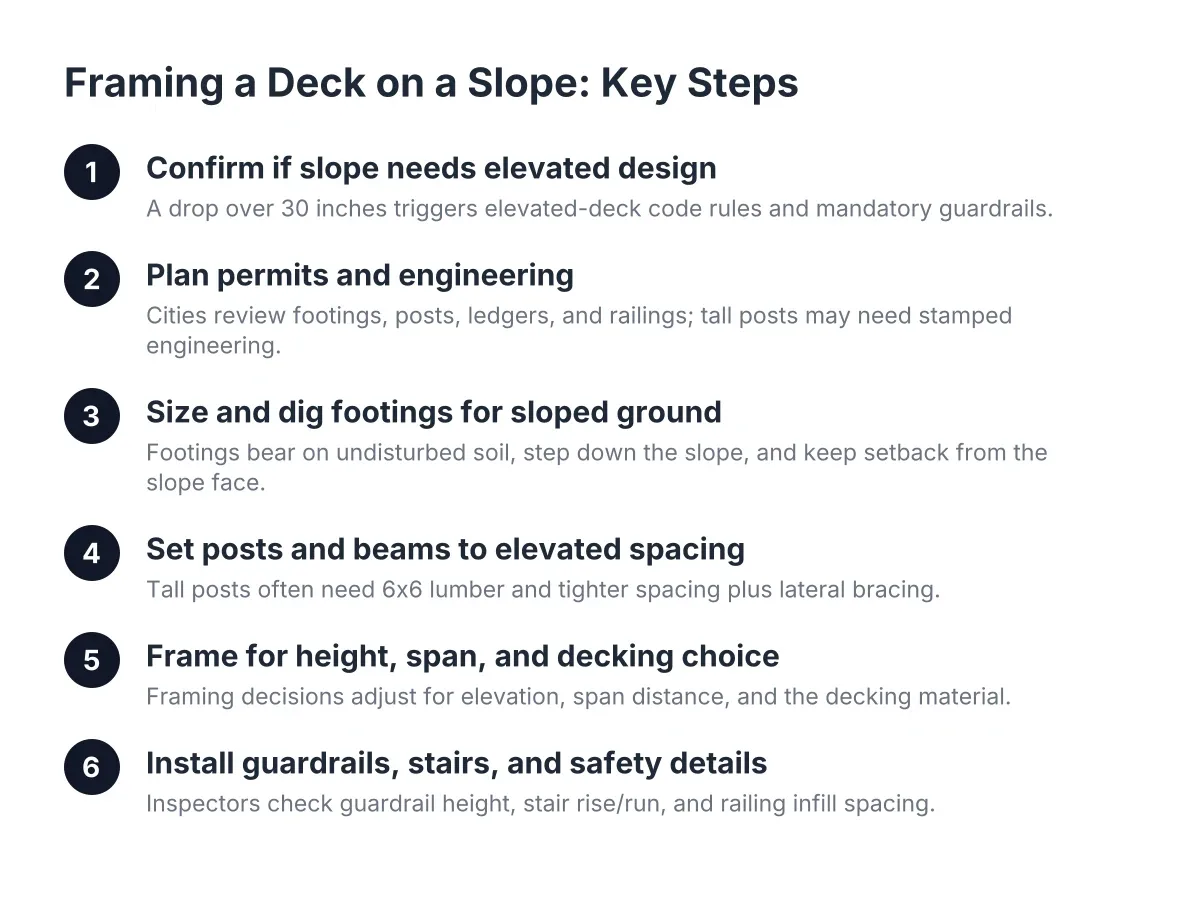
Height also triggers code requirements. For example, the California Building Code requires a minimum guardrail height of 42 inches for most residential decks more than 30 inches above grade, according to the California Building Standards Commission. Almost every elevated deck crosses that threshold, so railings stop being a style choice and become a structural requirement.
Slopes add a second layer. On a hillside lot in Ontario, California or nearby Rancho Cucamonga, the downhill posts might be twice as tall as the uphill posts. Taller posts need bracing, and footings on a slope often need to be deeper or stepped so they bear on solid, undisturbed soil rather than fill.
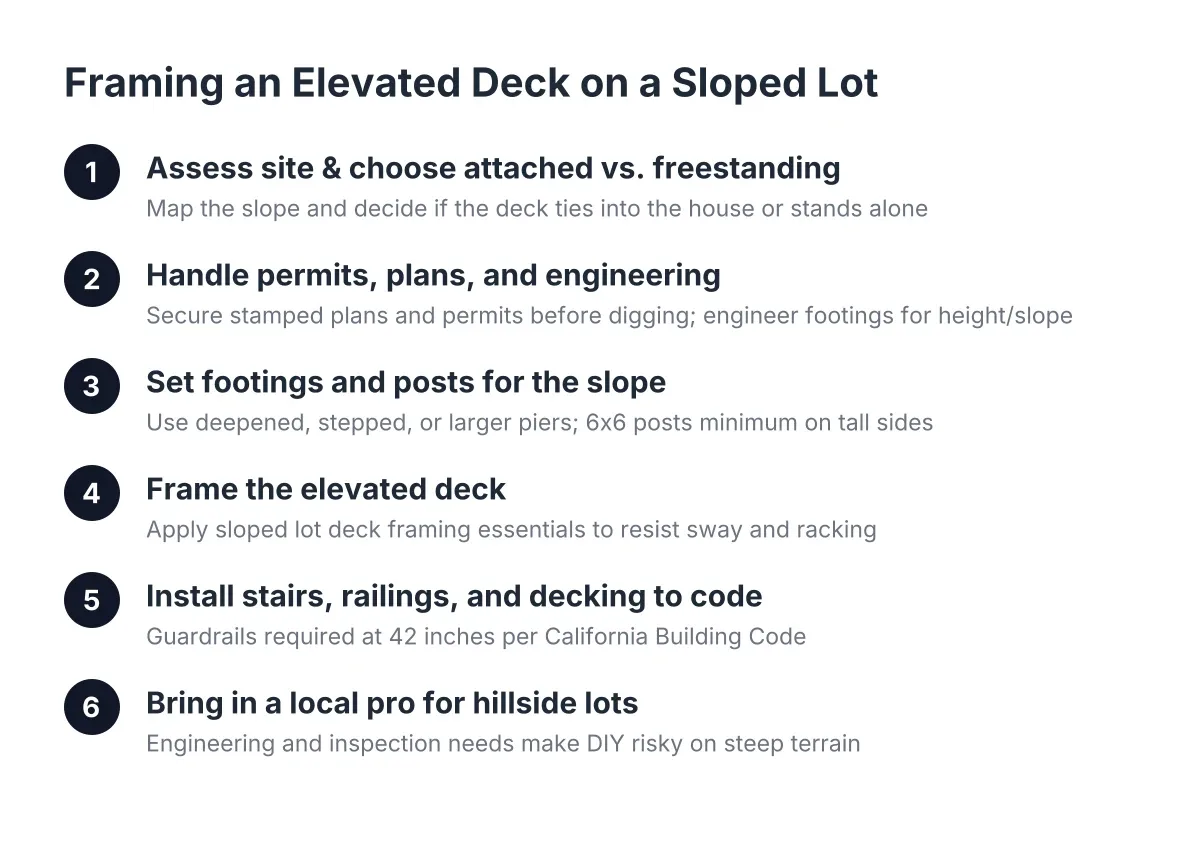
Step 1: Assess Your Site and Decide Attached vs. Freestanding
Start by figuring out what your lot actually allows. Walk the yard and note where the grade falls, where the door or future door sits, and how far the usable flat area extends. A yard that drops four feet over twenty feet is a different build than one that drops ten.
Next, decide whether the deck will attach to the house with a ledger board or stand free on its own posts. Each approach has trade-offs:
- Attached deck: Uses the house for support on one side, which can reduce the number of footings. However, the ledger connection must be flashed and bolted correctly, and the house framing has to be able to carry the load. On an attached deck on a hill, the ledger also sets your finished height, so everything downhill gets engineered from that fixed point.
- Freestanding deck: Stands on its own posts and beams, which avoids ledger problems on stucco or cantilevered floors common in Inland Empire homes. The trade-off is more footings and mandatory lateral bracing, since the deck cannot borrow stiffness from the house.
Suppose a homeowner in Fontana has a new-construction home where the back door sits five feet above a yard that keeps sloping away. In that scenario, a freestanding multi-level design often wins: an upper platform at door height, a short stair, and a lower level that follows the grade. That layout breaks one tall, expensive structure into two manageable ones.
Step 2: Handle Permits, Plans, and Engineering Before Anyone Digs
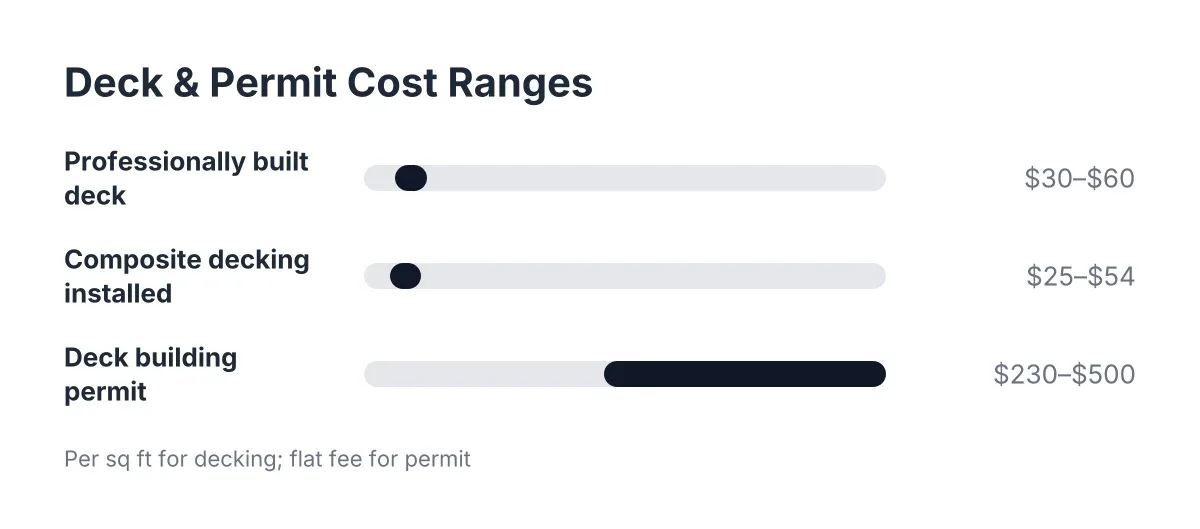
Every elevated deck in Ontario, CA needs a building permit, and most need stamped plans. The city will want a site plan, framing details, footing specs, and railing details before issuing approval. According to HomeAdvisor, a deck building permit typically costs between $230 and $500 depending on location, which is a small line item compared to tearing out work that fails inspection.
Structural engineering for elevated decks comes into play when the deck is tall, the soil is questionable, or the design cantilevers past its beams. An engineer sizes the footings, posts, and connections for your specific lot rather than a generic table. On hillside properties in Riverside County or the foothills above Upland, this step is where tricky-terrain projects get solved on paper instead of failing in the field.
This is also the stage where a realistic budget takes shape. As a general benchmark, Angi reports professionally built decks average $30 to $60 per square foot, and height, slope, and engineering push elevated projects toward the upper end of any deck construction cost per square foot range. If you want a deeper breakdown, elevated deck construction cost is covered in its own guide.
Step 3: Set Footings and Posts That Can Handle the Slope
Footings are where elevated and hillside decks are won or lost. Each concrete footing must sit on undisturbed native soil below any loose fill, and on a slope that can mean digging deeper on the downhill side. Proper deck footing and post installation on a grade requires solving sloped lot deck framing challenges with one of these solutions:
- Deepened footings: Standard piers dug deeper on the downhill side until they reach stable soil.
- Stepped footings: A series of footings at different elevations that follow the slope, each bearing on solid ground.
- Larger-diameter piers: Wider footings that spread the load when taller posts concentrate more weight on fewer points.
Posts for elevated decks are usually 6×6 lumber at minimum, not the 4x4s you see on low platforms. Taller posts flex more, so anything over about eight feet typically gets diagonal knee bracing or sheathed skirting to stop sway. Every post connects to its footing with a metal post base that resists uplift, which matters in Southern California wind and seismic conditions.
An inspector will check footing depth and placement before concrete is poured. This is one of the inspections that makes the permit process worth it; a footing poured on fill is invisible once the deck is finished, right up until it settles.
Step 4: Frame the Elevated Deck—Sloped Lot Deck Framing Essentials
With posts set, framing follows a clear sequence. First, beams go on top of the posts, sized to span between them without sagging; taller decks often use doubled or tripled 2x lumber or engineered beams. Post-to-beam connections use through-bolts or heavy structural connectors, never nails alone.
Next come the joists, which run perpendicular to the beams and carry the decking. Joist spacing depends on your decking choice: most composite decking requires 16-inch or even 12-inch spacing, while some wood decking allows wider spans. Joist hangers tie each joist to the ledger or rim, and blocking between joists stiffens the whole platform. Sloped lot deck framing on a hillside often demands deeper beams and more blocking to handle the varying post heights and lateral forces at play.
For an attached deck, the ledger gets lag-screwed or through-bolted into the house rim joist with proper flashing above and behind it. Ledger failures cause most serious deck collapses nationwide, so this connection, plus lateral load ties back into the house framing, gets specific attention from both the builder and the inspector. On freestanding designs, diagonal bracing between posts does the same anti-sway job.
A multi-level deck repeats this sequence at each platform height. The levels share some posts where it makes sense, and short stair runs connect them. Framed well, a multi-level layout on a sloped backyard often costs less than one giant elevated platform because the downhill structure stays shorter.
Step 5: Install Stairs, Railings, and Decking to Code
Stairs on an elevated deck are a structure of their own. A deck eight feet up needs a stair run of thirteen or more steps, which requires its own footings at the base, stringers sized for the span, and often an intermediate landing. On steep lots, an L-shaped or switchback stair keeps the run inside the property instead of marching down the hill.
Guardrails come next. Since the deck exceeds 30 inches above grade, the 42-inch minimum guardrail height applies, with balusters spaced so a 4-inch sphere cannot pass through. Deck railing installation on a tall deck is also a lateral-strength issue; posts must be blocked and bolted so the rail resists a hard outward push, not just look straight.
Finally, the decking goes down. Composite decking is popular on elevated decks in the Inland Empire because the surface is hard to reach for refinishing once the deck is ten feet in the air. Angi puts professionally installed composite at $25 to $54 per square foot, versus wood decks that cost less upfront but need staining and sealing on a structure you may need scaffolding to maintain. There is no wrong answer, but maintenance access should weigh heavier in an elevated deck decision than it does at ground level.
What Elevated Deck Construction Involves at Each Stage: A Quick Recap
Here is the build elevated deck step sequence in one list you can use to compare how different builders describe their process:
- Site assessment, slope evaluation, and attached vs. freestanding decision
- Permit application, plans, and engineering where height or soil requires it
- Footing excavation and inspection, then concrete and post bases
- Posts, beams, and bracing sized for the actual height
- Joists, blocking, and ledger or lateral connections
- Stairs with their own footings and landings
- 42-inch guardrails and code-compliant baluster spacing
- Decking, fascia, and finish details
If a builder glosses over footings, bracing, or the permit process, that is your cue to keep asking questions. Elevated deck construction is exactly the kind of project where the invisible work determines whether the deck is still solid in twenty years.
When to Bring In a Local Pro for a Sloped or Hillside Lot
Some situations call for professional design from day one: decks more than a few feet above grade, lots with significant slope or suspect fill soil, second-story walkout decks, and any project where the deck ties into the house structure. These are the builds where an experienced Ontario, CA deck builder earns the fee, because footing and framing solutions for slopes do not come from a big-box how-to sheet.
You now know the sequence, the code triggers, and the questions that matter. Ask any builder how they handle footings on your specific grade, who pulls the permit, and how they brace tall posts. If the answers are specific and confident, you have found someone who builds elevated decks step by step the right way, not someone learning on your hillside.
If you need custom deck design, Inland Empire Decks can help.
Prefer to talk it through? Call (909) 298-8578 — a quick call is usually the fastest way to get a straight answer for your situation.