Deck Size Expansion Timeline: How Long a Full Deck Expansion Takes
If you already have a deck and want more of it, the deck expansion timeline usually runs shorter than building new, but it has one step a new build does not: tying fresh framing into a structure that has been sitting in Inland Empire sun for years. That connection point is where expansions succeed or fail, and it is the detail this guide keeps coming back to. Below is the full process, step by step, from the first framing inspection to the final walkthrough, written for Ontario, California homeowners planning their first major deck project.
For most expansions in the Ontario, CA area, expect roughly two to six weeks from first site visit to finished deck, with the build itself taking a few days to two weeks depending on size and complexity. Permits and material lead times, not carpentry, usually control the calendar.
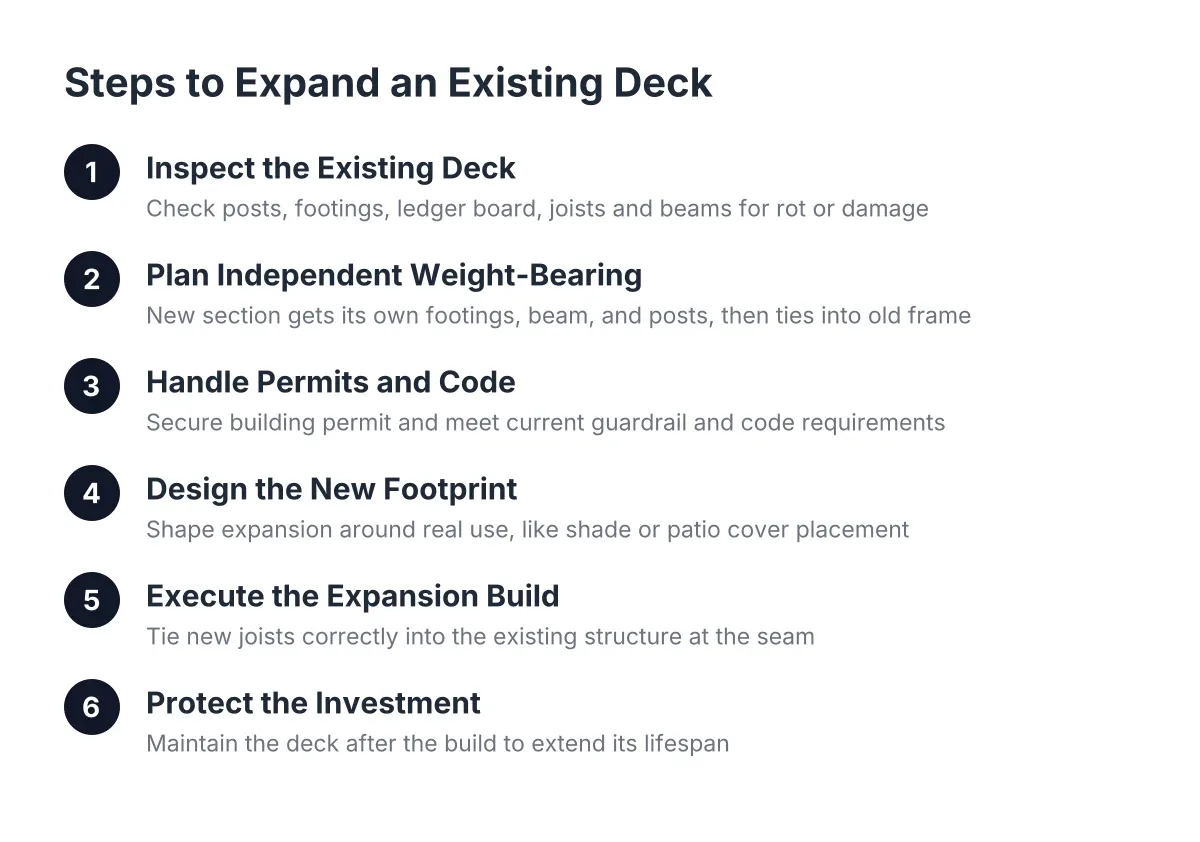
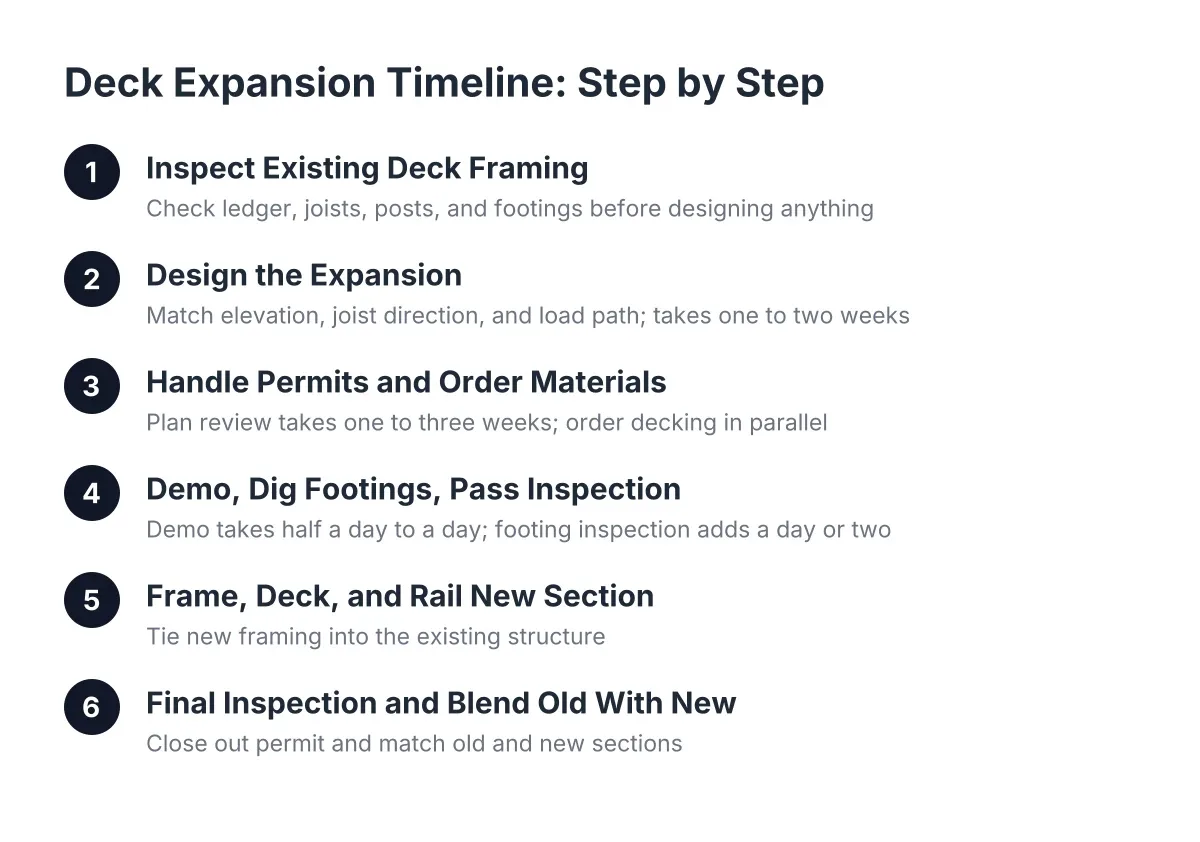
Step 1: Have the Existing Deck Framing Inspected First
Before anyone talks design, get eyes on what you already have. An expansion only makes sense if the existing structure can carry its share of the new load. A deck builder should pull back a few boards or crawl underneath to check the ledger connection, joist condition, deck support posts, and footings.
This matters more than most homeowners expect. According to the North American Deck and Railing Association (NADRA), an estimated 30 million of the more than 60 million decks in the U.S. are past their useful life and need repair or replacement. If your deck falls in that group, expanding it means bolting new construction onto a failing frame.
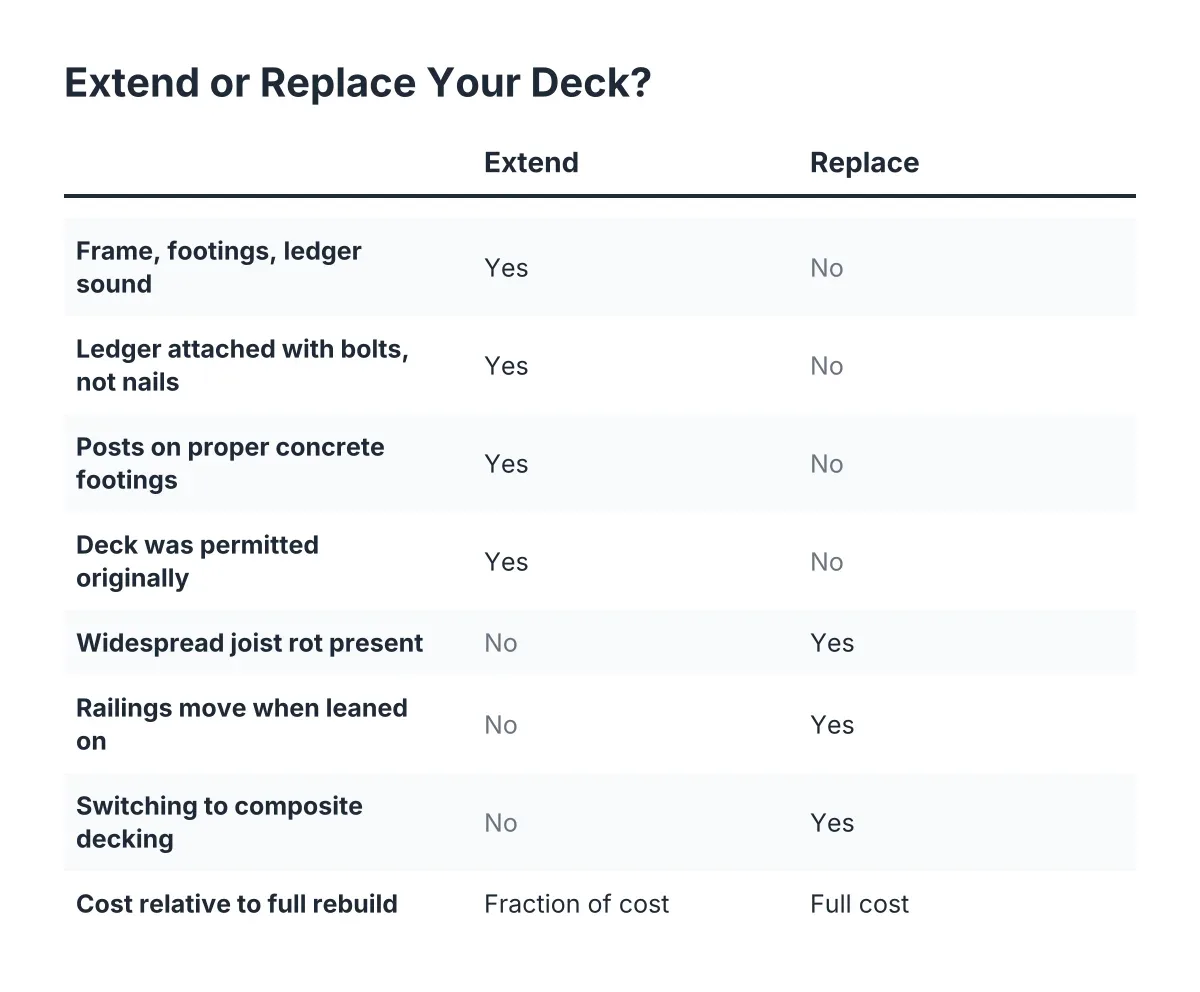
The inspection tells you which path you are on:
- Sound framing: the expansion can tie directly into the existing structure.
- Localized problems: deck repair or deck board replacement happens first, then the expansion proceeds.
- Widespread rot or undersized framing: a full deck replacement is the honest answer, and it often costs less than propping up a bad frame.
Timeline impact: the inspection itself takes an hour or two. Building repairs into the plan can add several days to the overall schedule, but it is time you want on the front end, not discovered mid-build.
Step 2: Design the Expansion Around the Existing Structure
Next comes design, and this is where expansions differ from new builds. The new section has to match the old one in elevation, joist direction, and load path, or you end up with a lip at the seam, a bouncy transition, or railing posts that land in the wrong spots.
A good custom deck design for an expansion answers three questions. Where will the new footings go? How will new joists connect to old framing? And will the decking run continuously across the seam or break at a picture-frame border? Decisions like connecting two deck levels with stairs, or adding stairs to an existing deck on the expanded side, get settled here too.
One structural detail deserves attention: overhang. Existing decks sometimes cantilever their joists past the beam, and a deck cantilever chart in the building code limits how far that overhang can go based on joist size and species. An expansion cannot simply extend an already-maxed cantilever. New footings and a new beam have to carry the added span.
Design typically takes one to two weeks, including a revision round. If you are choosing between composite decking and a wood deck for the new section, decide now; matching or intentionally contrasting the existing surface affects the material order in Step 3.
Step 3: Handle Permits and Order Materials
In Ontario, California, most deck expansions need a building permit, especially anything attached to the house, elevated, or over a modest height above grade. The city reviews the framing plan, footing sizes, and ledger attachment. As of 2026, plan review in San Bernardino County jurisdictions commonly takes one to three weeks for a straightforward residential deck, though timing varies by workload. For budgeting, HomeAdvisor reports a deck building permit typically costs between $230 and $500 depending on location.
A quick note for first-time planners: your builder should handle deck permits and planning, including drawings and city submission. If a contractor suggests skipping the permit on an expansion, treat that as a red flag. Unpermitted additions surface during home sales and insurance claims.
While the permit is in review, materials get ordered. Framing lumber is usually in stock locally. Composite decking in a specific color, or railing systems, can carry lead times of one to three weeks. Ordering during permit review keeps these two waits running in parallel instead of back to back, which is one of the biggest levers in the deck expansion timeline.
Step 4: Demo, Dig Footings, and Pass the First Inspection
Construction starts with selective demolition. The crew removes railing sections, fascia, and any decking along the connection edge so the existing rim joist and framing are fully exposed. On a typical expansion this takes half a day to a day.
Then come footings. New deck footing and post installation means digging to the depth the plan calls for, setting forms, and pouring concrete. In much of the Inland Empire the soil digs easily, but concrete still needs cure time before it carries load; plan on a few days between pour and framing. Most cities also require a footing inspection before the pour, which adds a scheduled stop of a day or two.
One thing to skip: ground-contact shortcuts. Homeowners sometimes ask about how to build a deck on the ground with blocks or pavers to save time on the expanded section. For anything attached to an existing deck, that approach creates two structures that settle at different rates, and the seam between them opens up. Proper footings keep the old and new sections moving together.
Timeline for this step: about one week, including inspection and cure time.
Understanding the Deck Expansion Timeline When Connecting New Framing
This is the step many general contractors get wrong, and it deserves its own explanation. The safe way to join new framing to old is not to nail new joists onto the old rim board and hope. The connection has to transfer load into posts and footings, not just into fasteners.
In practice that means one of two approaches. Either the new section gets its own beam and deck support posts right at the seam, so the old deck never carries the new one, or the existing beam is verified and extended so both sections share an engineered load path. Structural hardware, through-bolts rather than nails at the connection, and flashing at any ledger keep the joint strong and dry. Done right, the seam is invisible underfoot. Done wrong, it is the first place the deck sags.
Step 5: Frame, Deck, and Rail the New Section
With footings cured and the connection detail set, framing moves fast. A typical crew frames a 150 to 250 square foot expansion in two to four days. Deck framing includes the new beam, joists, blocking, and hardware, plus any stair stringers for new stairs.
Decking and railing follow. Composite deck installation runs slower than wood per square foot because of hidden fasteners and gapping requirements, but it saves you staining later. Deck railing installation, especially where new railing has to meet existing railing cleanly, takes another day or two. Multi-level deck construction, such as adding a second lower tier, adds roughly a week to this phase because each level repeats the footing and framing sequence.
For example, suppose a homeowner in Rancho Cucamonga wants to expand a 12 by 12 wood deck to a 12 by 24 outdoor living space with a new stair run to the yard. In that scenario, here is what the deck expansion timeline looks like:
- Framing inspection and repair scoping: 1 day
- Design and revisions: 1 to 2 weeks
- Permit review and material ordering, run in parallel: 1 to 3 weeks
- Demo, footings, and footing inspection: about 1 week
- Framing, decking, stairs, and railing: 4 to 7 working days
- Final inspection and cleanup: 1 to 2 days
Total: roughly four to seven weeks start to finish, with about two weeks of actual construction.
Step 6: Close Out the Final Inspection and Blend Old With New
Finally, the city inspector reviews the finished work: railing height, stair dimensions, hardware, and the connection to the existing structure. Passing this inspection is what makes your deck expansion a documented, legal improvement rather than a question mark at resale. That documentation matters; the National Association of Realtors' 2023 Remodeling Impact Report found homeowners recover 89% of the cost of a new wood deck through added home value.
The last task is cosmetic blending. On a wood deck, the new boards will look brighter than the weathered originals. Deck staining and sealing the entire surface, old and new together, evens the tone in a single afternoon once the new lumber has dried enough to accept stain. On composite, choosing a border or breaker board at the seam during design makes any color variation look intentional.
One honest limitation: if your existing deck was built without a permit, is more than a couple of decades old, or shows movement at the ledger, an expansion may not be the right call, and only an in-person structural evaluation can settle it. NADRA estimates that half of the decks in the U.S. are more than 25 years old, so this situation is common, not embarrassing. A local deck builder in Ontario, CA can tell you within one visit whether your project is an expansion, a repair-then-expand, or a replacement, and give you a realistic timeline for whichever path fits.
If you need custom deck design, Inland Empire Decks can help.
Related guide: deck size expansion — Complete Guide
Prefer to talk it through? Call (909) 298-8578 — a quick call is usually the fastest way to get a straight answer for your situation.